Showing posts with label blackened metal. Show all posts

Sunday, June 1, 2014

A New Beginning

It's just a new blog post...nothing too exciting.  :)

Ok, it HAS been a while.  Soon after my last post I got a new job with a 1-hour each way commute that cut seriously into my blogging time, not to mention sleeping and other recreational activities.  In August of 2013 I moved to Copperas Cove which reduced the commute but I just haven't gotten back into the habit of blogging my projects or the group efforts at Open Shop. We have lots of new fighters up here and Open Shop has typically attracted from 15-30 participants each week.

My wife is encouraging me to keep better notes on my projects and this is a handy way to accomplish that purpose while possibly inspiring/encouraging/goading others, so I will try this again and see how it goes.

So, my beloved lady enjoys both 11th century Scottish/Saxon culture and learing about rapier fighting.  I got her a shiny new mail shirt for Christmas (see RingMesh ) so clearly she needs a nice 11th century rapier-legal helm to go with it.  Right?

I started by adapting a spangenhelm pattern to fit her and be a bit more conical in profile.  I made it out of 18g. stainless to minimize maintenance and be sufficiently durable for both rapier and possible cut-and-thrust use.


Then I ordered some stainless perf-plate from Online Metal Supply through Amazon . I got a 12x24 sheet of 16g. 304 stainlesss with 3/16 holes, which should be enough for several projects. I trimmed a rectangle of perf plate to give a slightly rounded look and then gave it a 2-dimensional curve to tuck in nicely behind the nasal of the helm.  Then I coated it with vegetable oil and baked it at 550 degrees to give a dark brown finish.


Next I shaped a piece of chrome-tanned leather to attach to the bottom of the faceplate and tuck under the chin  to eliminate any possible shot path.  While I was at it I made a couple of leather pieces to wrap around the sides of the perf plate to make it more human-friendly.  Willoc prepared a batch of leather dye using tannin, cutch and fustic and we dyed it to resemble the color of the faceplate.  These pieces will be attached to the perf plate with copper rivets before the faceplate gets riveted to the helm.


I made a leather piece for the back of the head and on the second try got it to fit correctly and overlap the faceplate on the sides.  Since we had previously made a hardened leather gorget (see earlier post) we tooled and dyed this piece to match.  Next it will need to be soaked in glue and baked to harden and seal it, before riveting it to the helm.

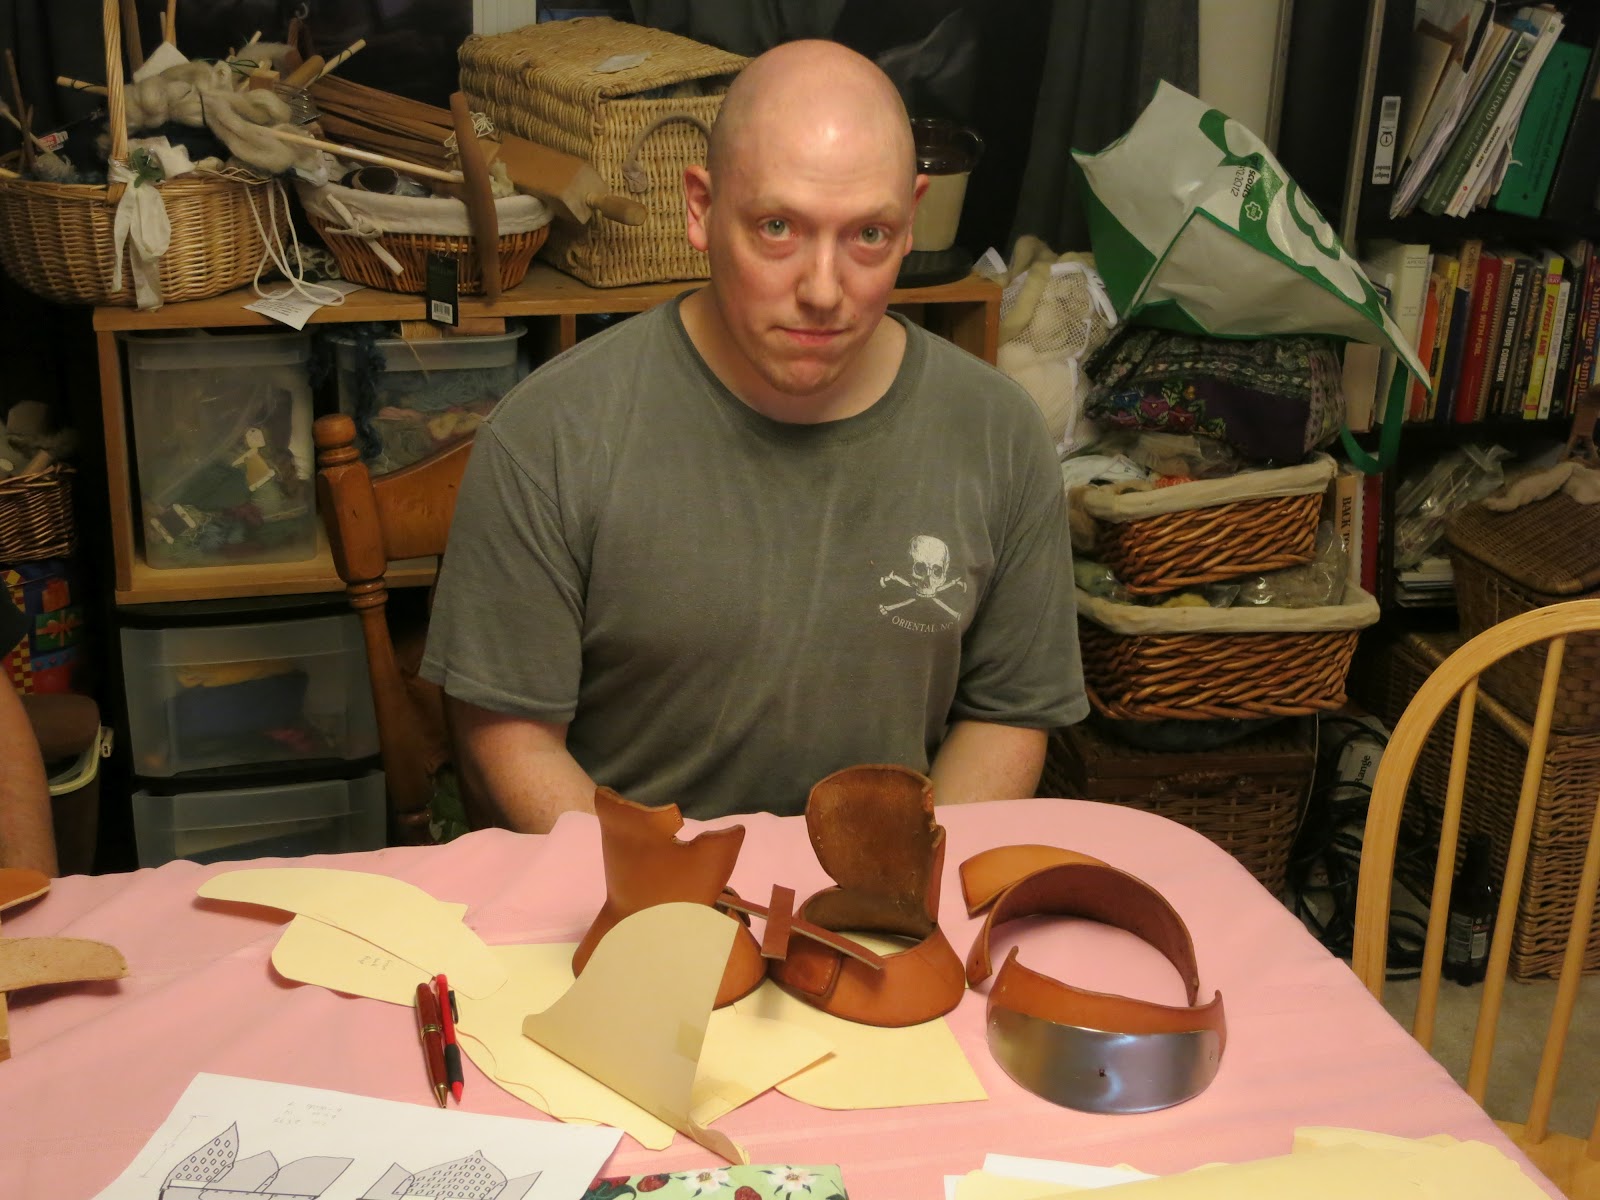
Here it is with the pieces set together as if they were actually assembled.

There is still more work needed but I'm making progress.  I hope you enjoyed the update.

Friday, August 3, 2012

Open Shop 7-26-2012

We had a small but dilligent group on the 26th.  I have made arrangements to work with a pair of visiting Barons from Elfsea (Fort Worth and surrounding communities) on a Saturday in August and I wanted to have some spring-stainless vambrace splints ready to rivet on, so I got an early start.  The 20 gauge (.038 inch thick) 410 alloy is a joy to work with, because it forms so nicely and then it hardens so well when you heat treat it.  I don't have a swage block with the right curve for forming splints, so I cut one end of a wood 2x4 and hammered the metal into that.  My heavy dishing hammer left quite a few tool marks in the metal so I needed to do some planishing to smooth it back out.  If these were not intended for hidden armour I would want to use a different technique, like placing a section of pipe over the splint and then hammering on that to keep the curves smooth and even.  Here are the splints before curving or drilling the rivet holes:

 After curving them I took the splints to Gaston's shop for a little forge action.  Heat treating left forge scale on the splints in an odd, almost damascene pattern.  But after a little brass-wire-wheel work they polished up to a smooth black look.  Getting really aggressive with the wire wheel could get this back to shiny silver metal, but why?  For hidden armour or anywhere you want a blackened metal look these will be fine.


Wyllow was focused on preparations for the Steppes Artisan competition.  Here she has laid out a mock-up of her table arrangement.  How much wool CAN you get on one table, in how many different shades of red?


 Josh worked on strapping and assembling his gorget and half-gauntlets.


Wolf got some instruction and borrowed a leather-sewing needle so he can finish his half-gauntlets at home this week.  We also cut out helm liners for both Wolf and Ben.


 Ben cut and beveled a gorget.  Next he will need to burnish and then harden it with glue and baking.


Evie and Gunna avoided the camera but they made delicious medieval French Toast, with a hint of rosewater.


 ...and that was a night well-spent!

Friday, February 24, 2012

It is a good day...to make armour!

Thursday, Feb. 23rd - My darling daughter's 22nd birthday, but we won't be celebrating together until Saturday.  So instead of lighting candles I managed to light my chain hauberk on fire.  Ok, it wasn't actually on fire...only the olive oil it was coated with was burning.  But once that fire was out...


Shiny blackened mail!

Notice the two "before" samples that used to be the end of the sleeves.
Then it was time to cook dinner (yes, I can document this dish to the Roman province of North Africa)

Then we got down to business...well, ok.  Then we goofed around a bit.  Here Nora demonstrates the versatility of a knee cop that also serves as a skull cap.


But then she got to work on a wood-burned knotwork dragon for the top of one of the dye-shop shelves.  This is knotwork both for the intertwined dragon body and for the use of a knot in the wood to form the dragon's eye.
 

 Wolf finished dishing his second knee cop and did an excellent job of making them match.  He later strapped both cops but I'm afraid I didn't get a picture of them at that point.


Coren and Steven worked with me for most of the evening on developing armour plans for their 1300s Italian man-at-arms armour, while their friend Patricia visited with Gunna, Belle and Nora.  I didn't see what Gunna was making but it seems to involve a great deal of embroidery thread.  The Italian-based kits will use sugarloaf helms, armoured surcoats, leather vambraces, rerbraces and shynbalds, simple wingless steel elbows and soupcan knees worn over gamboised cuises.  Here are some inspiration images:


Khutulun arrived late but we still managed to select a pattern, cut out the metal piece for the front of her gorget, file and sand the edges and drill the rivet holes.

You know you are doing something right when attendance at "Open shop night" includes 3 guys and 6 girls.  :)  See you there next week!